The following guides will help you to operate the projectors, monitors, and digital displays located in the classroom. If you encounter a technology issue during a class, use the guides and troubleshooting steps below. If the problem persists or if you require additional assistance, contact the Help Desk at kohelp@iu.edu or call 765-455-9315. A technician will respond as soon as possible.
Using the Lecterns/Projectors
Basic Operations
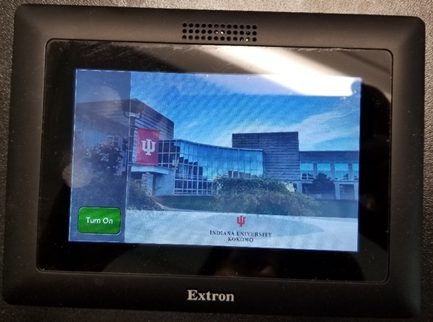
The touch panel is at the top of the lectern. If the screen is black, wave your hand in front of it or poke it to wake it up. When you see the screen shown below, press the “Turn On” button.
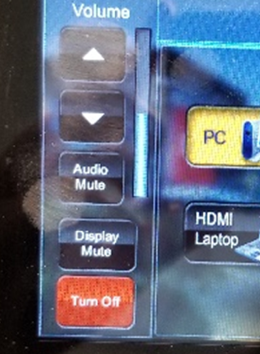
When you are finished using the projectors, choose the red Turn Off button on the display.
Select Power Down.
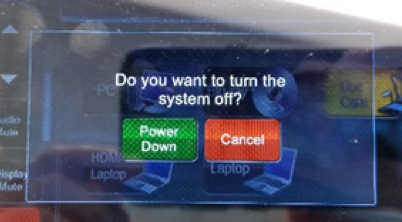
Please log off of the computer if you are using the one on the podium. Power down the panel, but not the computer.
Turning the projector on or off. Look for the touch panel on the lectern surface.

Press the input you wish to display to start the lectern

When you are finished using the projector, choose the blue power button in the lower left of the panel to turn the lectern off.
Please log off of the computer if you are using the one on the podium. Power down the panel, but not the computer.
Choosing a display source
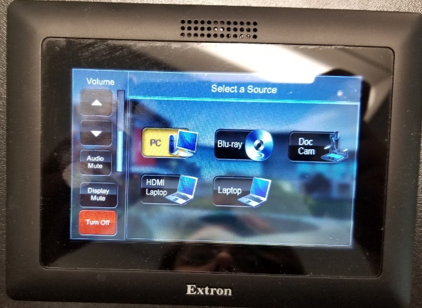
After the touch panel display is turned on, you are given the choice of several display sources. Touch the icon to choose the display source you would like. The input selected to start the lectern will be the default display for your session.
Volume adjustment, muting audio or display
<
You can control volume with the volume control buttons on the bottom of the panel. Touch the +/- buttons to increase/decrease ceiling speaker volume. You may also choose to mute the audio with the audio mute button (speaker icon with slash through it). The speaker mute button will turn blue when mute is active.
<
To mute the display, select the “BLANK” button. Select any live input to exit video mute and display that source.
Display Types
PC

Touch the PC button to select the PC as display source. The icon will turn blue when active.
Blu-ray
Package A systems have no dedicated Blu-ray player in the rack. DVD playback is available via VLC with PC control. If Blu-ray is required, please check out a USB Blu-ray drive from the Help Desk.
Doc Cam
<
Touch the DOC CAM button to select the document camera as display source. The icon will turn blue when active.
Laptop

Touch the LAPTOP button to select the laptop HDMI as display source. The icon will turn blue when active.
When the touch panel display is turned on, you are given the choice of several display sources. Touch the icon to choose the display source you would like. The classroom computer is the default display (PC).
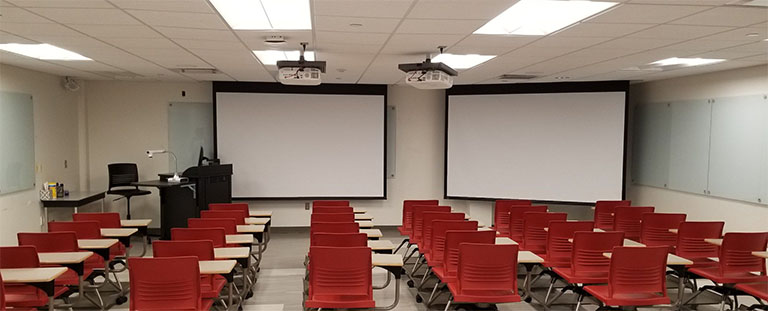
If your classroom is equipped with dual projectors, you may have the option to choose between using a single source for both projectors or using a different source for each projector. For instance, a PowerPoint slide can be shown on the left display while the Document Camera can show your workbook on the right.
You will need to choose which source you want on each display. Display selection buttons are at the top of the touch panel (Left Display, Center Display, Corner Display, or Right Display). Select the display you want to set, then choose the source. Repeat for the second display.
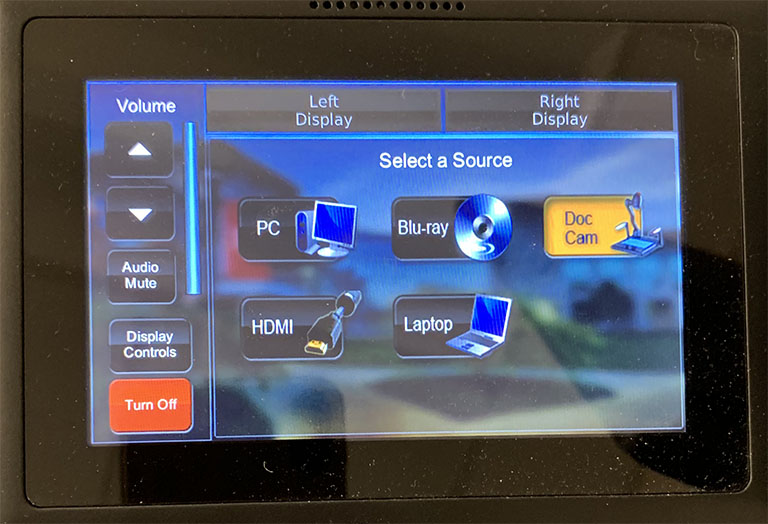
You can control volume with the volume control buttons on the left side of the panel. You may also choose to mute the audio or display (muting the display will make the display go black).

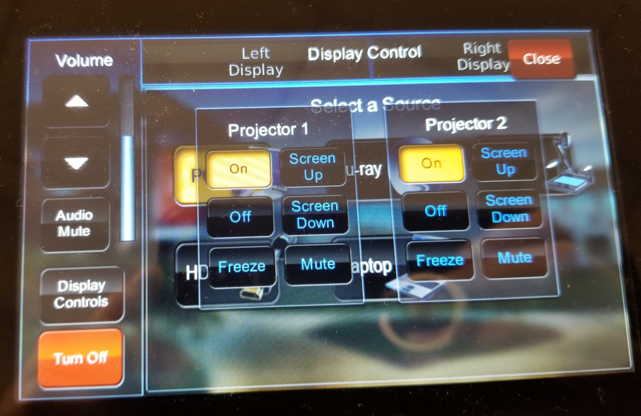
When the Display Controls button on the left side of the panel is tapped, you will see a box with options for Projector 1 and Projector 2 (if equipped). Projectors are on by default, but may be turned off or back on using this menu. Freeze allows you to freeze the image on one or both projectors. Mute allows you to mute the display on one or both projectors without turning them off entirely. Screen Up and Screen Down are disabled. Press the red Close button in the top right of the screen to exit this menu.
Display Types
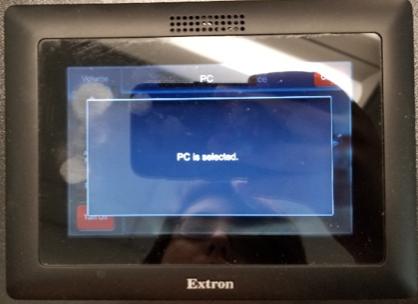
If you select PC, it will display what is on the PC attached to the podium. After selecting PC, you will see a text box informing you that PC has been selected. To remove the message from the screen, push the red X button in the top right corner.
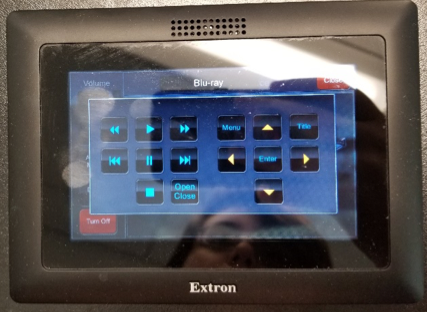
Blu-Ray will display a DVD or Blu-Ray disc in the Blu-Ray player located in the cabinet in the front of the podium. After touching on this button, the Blu-Ray display buttons (play, pause, fast forward, etc.) will display on the panel screen. Like the PC, the red button in the top right corner will exit from the Blu-Ray buttons.
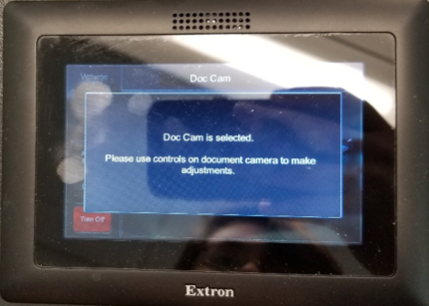
Selecting the Doc Cam will display anything projecting through the document camera. When you select this source, a message on the panel will indicate that you are successfully connected to the display. To exit this message, find the red button in the top right corner.
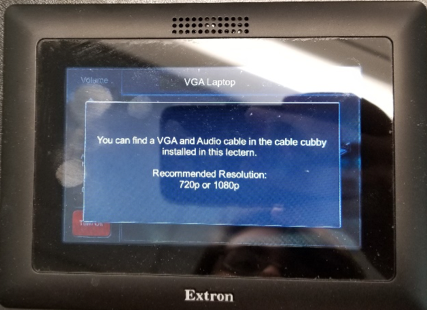
You will need to select HDMI Laptop or Laptop when you want to display something from your laptop. Before you select it on the panel, plug in the HDMI cable (located in the cable cubby next to the panel) to connect an HDMI-capable laptop. If your laptop is not HDMI capable, use the other two cables for connection and sound using a standard/VGA-enabled laptop. Once connected, a message will pop up on the panel indicating that the laptop is connected to the display. To exit the message, touch the red button in the top right corner.
Hybrid Classroom Technology Guide
Normal classroom technology Lectern Instructions link is located on the desktop at each lectern. These instructions will help you navigate through the lectern panel display. Most rooms have all you will need for Hybrid, some rooms have been supplemented with a front mounted camera and ceiling microphones.
If you are using this room for a Hybrid/Synchronous classroom, you can use Zoom controls to navigate through camera and microphone choices. Please register for Zoom Advanced training through the CTLA if you would like more training on Zoom features or check out IU's Zoom Knowledge Base article for more information.
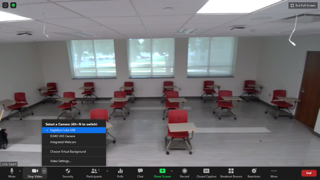
Log in to Zoom.iu.edu, and go to your room. You can change cameras by clicking on the up arrow next to the Stop/Start Video button. The EagleEye Cube will give you a view of the classroom. The ELMO will give you a view from the doc camera. The Integrated Webcam will give you a view of the instructor at the lectern. USB webcams will be available from your department if you are needing another camera angle. Once you plug in the USB webcam, another camera option will show on the menu.
| EagleEye | ELMO | Integrated Webcam |
 | 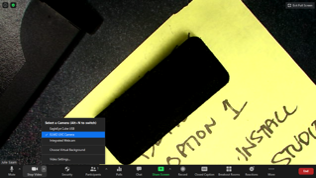 | 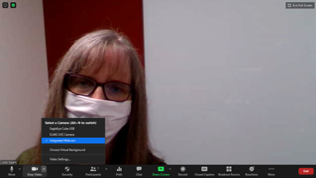 |
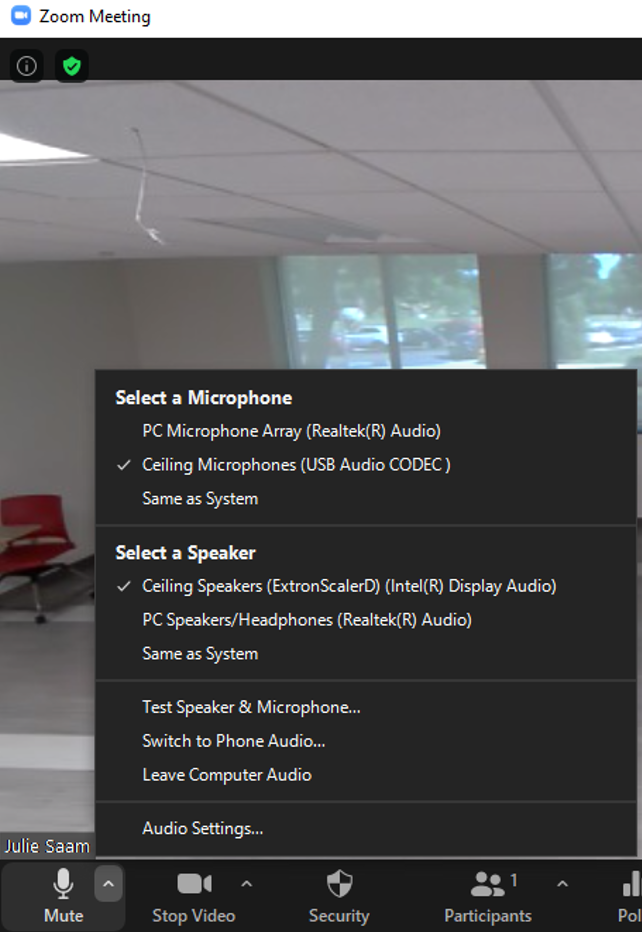
You are also able to change microphones and speakers by clicking on the up arrow next to the Mute/Unmute button. For microphones, PC microphone is the microphone in the lectern computer. Ceiling microphones are the new ceiling microphones hanging from the ceiling in front of the room. We recommend using the ceiling microphones, but the PC microphone works well too. For speakers, PC speaker is the speaker in the lectern computer. Ceiling speakers are the speakers in the ceiling. We recommend using the ceiling speakers. Make sure to control the volume from both the computer and the lectern panel.
Collaborative Table Monitors in Mosaic Classrooms
Classrooms with Mosaic Active Learning Environments are equipped with multiple screens around the room that allow for easy student collaboration and student engagement. These instructions will help you navigate the many options that are available for this system.
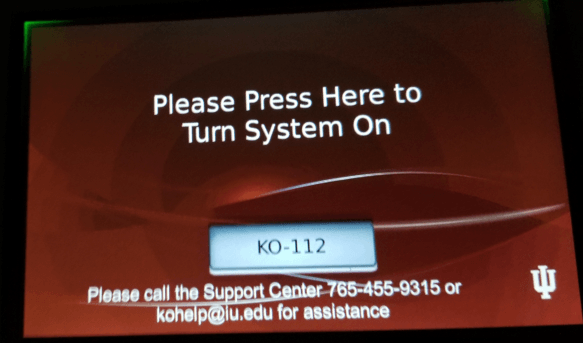
To turn the system on, find the touch panel located on the lectern and touch "Please Press Here to Turn System On". The system may take a few seconds to boot up.
When finished, please choose the Shut Down button on the display and select Yes to Power down. Please log off of the computer if you are using the one on the podium. Do not power down the computer.
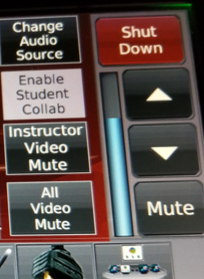
By default, all monitors (2 in front and 4 collaborative tables) have the same source display, originating from the options available at the instructor's lectern. Sources are selected by tapping the icon at the bottom of the touch panel. For descriptions of each source option, see the above section labeled Display Types.
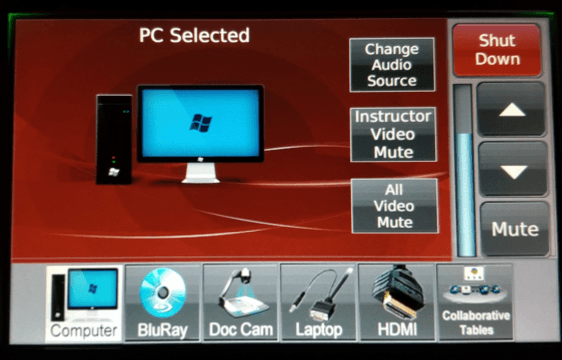
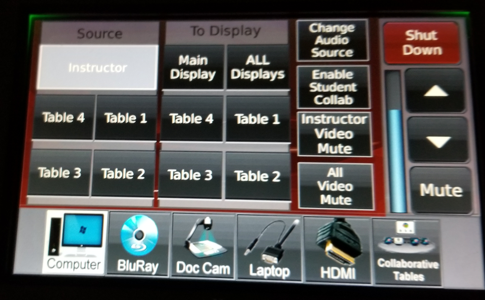
If you have been using student sources and want to restore all monitors back to the lectern source, choose Collaborative Tables (button on bottom right) > Instructor > ALL Displays.
Each collaborative table is equipped with a computer, monitor, and three cables for connecting student computers to the system (HDMI, VGA, and Mini DisplayPort).
Enabling Collaboration
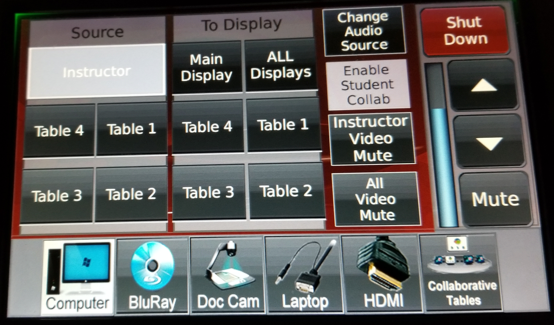
Choose Collaborative Tables > Enable Student Collab to allow students to have control of the computer and monitor at their collaborative tables.
Using the computer
If the students are using the computer at the table, make sure the center button on the table is depressed and lit. When activated, the monitor at the table will display the computer source and can then be controlled by the mouse and keyboard stationed at each table. (note: if the mouse and keyboard do not activate when you switch to student control, check the power buttons located under the mouse and keyboard.)
Using student laptops as a source
Students can connect their laptops to the system to display their screen on any of the collaborative table monitors. Connect to the system using the cables provided.
To display on the screen at their table, plug in the cable and press the "Show Me" button on the cable.
To display the student computer to other monitors, select the source on the lectern (under "Source" on left side) and choose the display to which to project (under "To Display" in the middle). Examples are provided below.
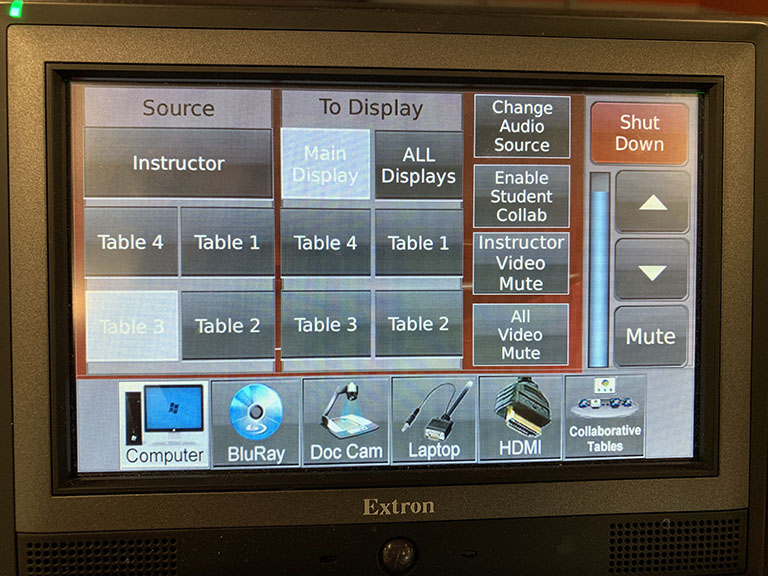
These options will display the laptop connected to table 3 to the front right display (note: the front left display will always remain the instructor's monitor).
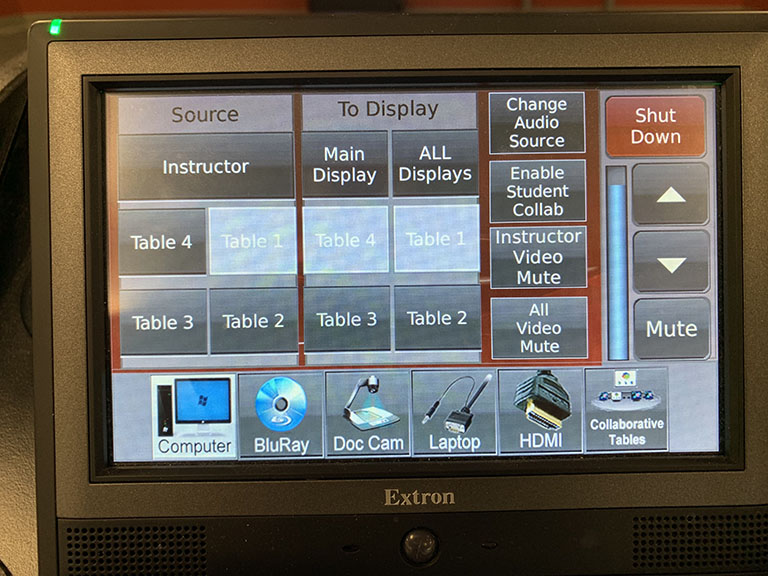
These options will display the laptop connected to table 1 to the monitors on table 4 and table 1.
Audio options
Audio level can be adjusted or muted using the buttons on the right side of the panel.

The Change Audio Source button is disabled.
Video mute
The Instructor Video Mute button will mute the Instructor monitor display. All video mute button will mute all displays.
Troubleshooting Tips
Check the Power
If the computer is not responding, first check the monitor, then the tower. Try the power button on the lower right side of the monitor. If the computer is not on, press the power button on the computer tower located inside the lectern.
Windows + P is the Key

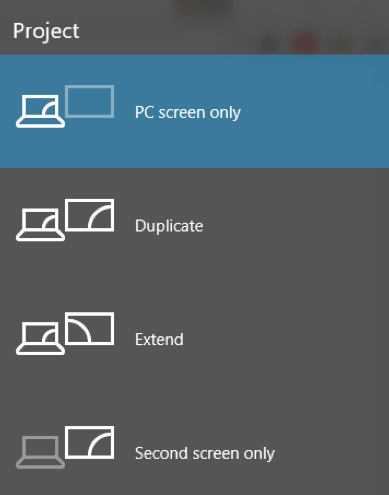
If the display of computer is not coming up on the screen or wall monitor, use Windows +P key strokes to show choices of:
- PC Screen Only (no Wall monitor display)
- Duplicate (Both Wall monitor and PC Screen display identical images)
- Extend (Used for Power Point, Slides on the wall monitor and notes on PC screen)
- Second Screen Only (no PC screen display)
Still having trouble?
Contact the Help Desk at kohelp@iu.edu or call 765-455-9315.

